Lighting!
After having the recent experience of being apart of the lighting team on our short film Sunny, I decided to take my lighting skills further and take another lighting class this spring semester in 2025. I really enjoy learning how to composite shots in Nuke and furthering my skills with lighting shots in Maya.
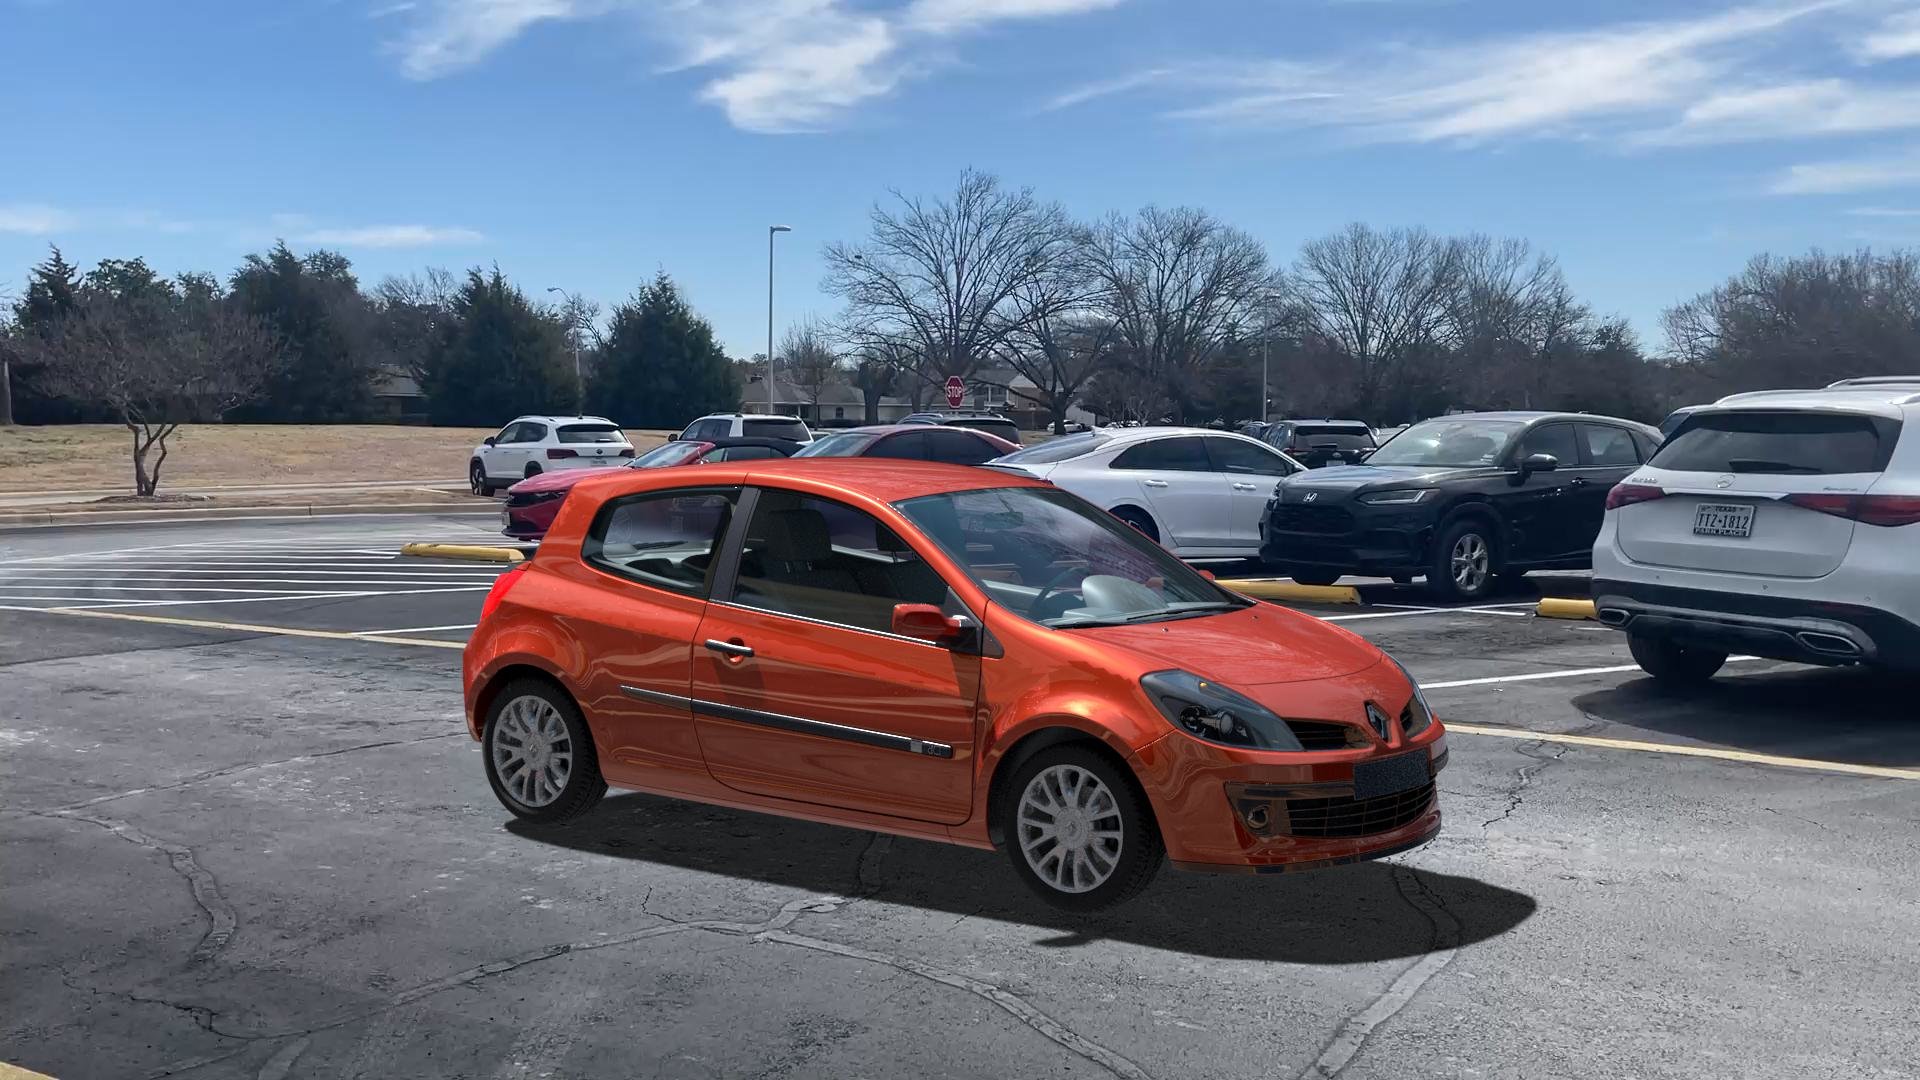
Car Project
To make this project work, I had to record actual footage outside and take my video at the parking lot of the UTD campus. I had to then use Nuke X to turn my video into a usable backplate for the car. The car model was not made by me, but I used the Arnold standard surface material presets to surface it. I set up my lights and lit the car in Maya and rendered several passes of the car to send to Nuke. I had shadow, chrome, and beauty passes for the car renders. Foreground and background glass passes for the car windows. Finally, crypto passes for both the foreground and background car windows. The crypto passes were needed to mask out the car windows so I could freely edit the windows separately. All my passes were imported into Nuke and composited there for color grading and making any edits and final changes. This was very helpful because it allowed my car to have a more metallic look to it and adjust the saturation of the red on the car’s color.

Lighthouse Project
Lighthouse final render.
This was the first project I did this semester. None of the models are made by me and I lit the scene in Maya. The sand shader was made with a preset in Substance Painter while the water shader was made in Substance Painter by me. I had to render several passes to import to Nuke. I had water, land, lighthouse and house, and lighthouse light passes. The final render was composited in Nuke. The backplate was a stock image I found online and I wanted to make sure my lights in Maya matched the sky in it well.

Full node graph of my composition in Nuke.
See the breakdown in full detail below.

The first part of the node graph I had to import my scene from Maya into Nuke and set up a camera node. This was done so I could implement my chosen backplate into my composition. I also used a defocus and grade node to touch up background to blur it a bit and change the coloring.
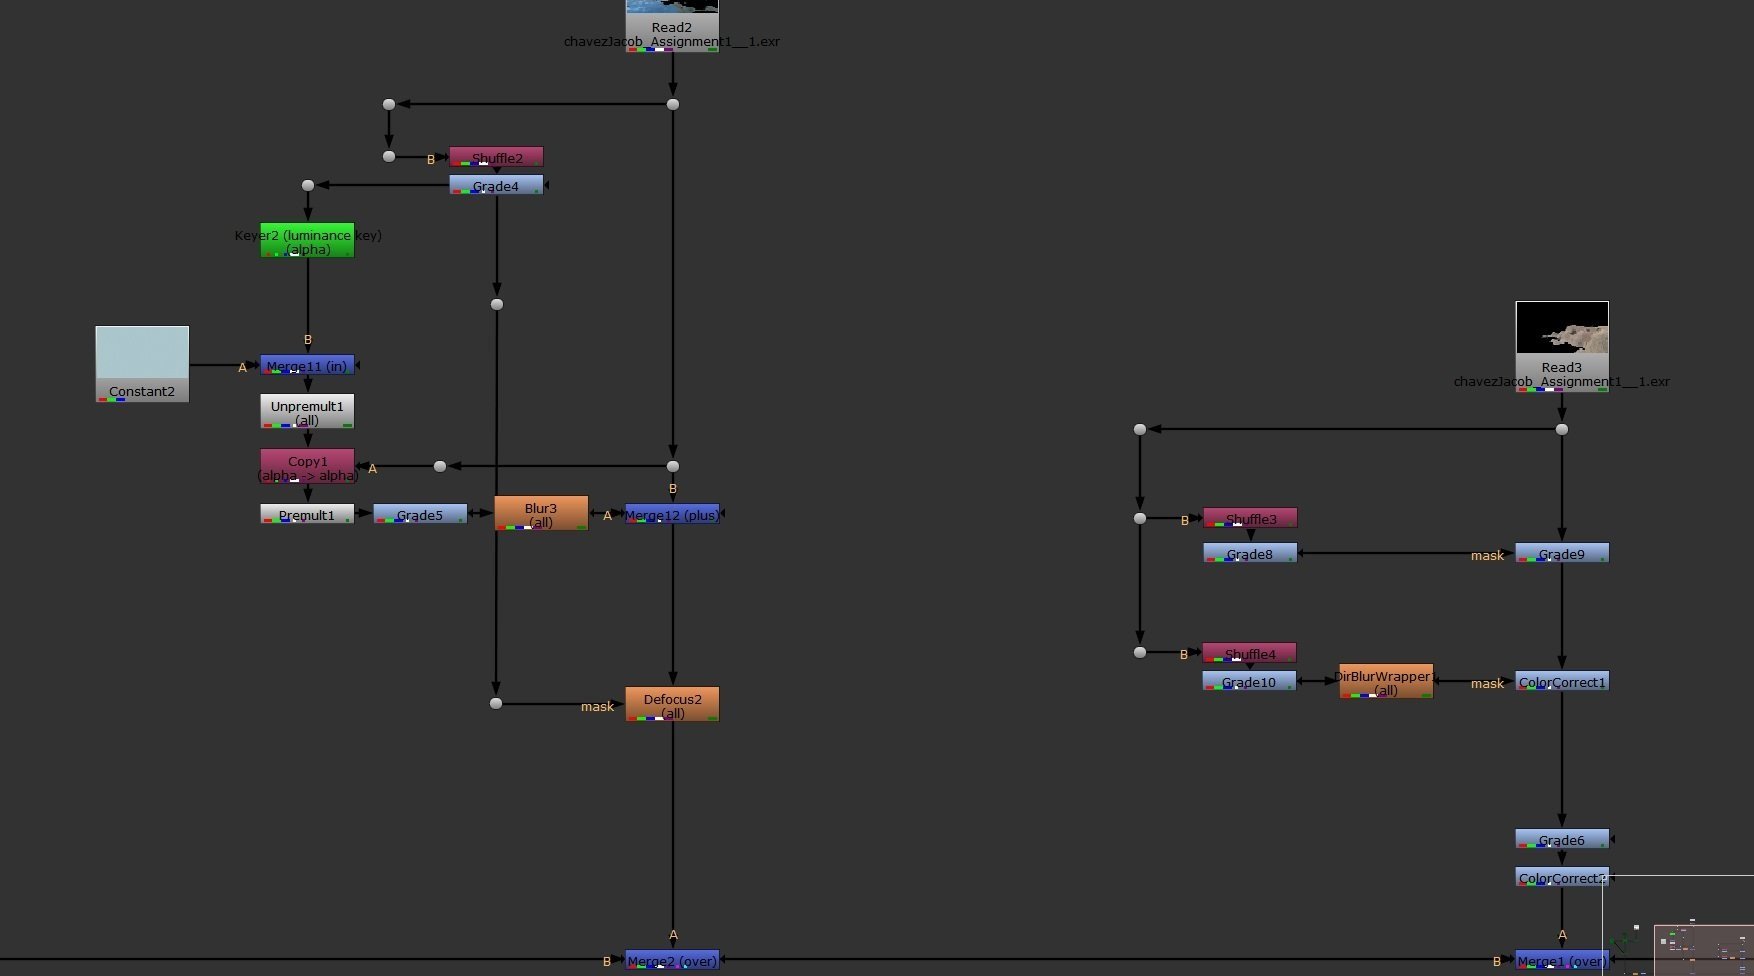
The next part of the pipe is the ocean pass. I used the keyer to create a water reflection on the water. After the ocean pass was the land pass. Here I mostly did some slight color correcting and adjustments to give the land a bit more saturation.

The final parts were the lighthouse and house pass, and the lighthouse light. The actual lighthouse lightbulb used the crypto node so i could select it out and use a glow node to give the lighthouse an extra sense of glowing from the source. I used a blur node on the actual light so I could make it softer.